|
| C-Add/Change/Delete Vendors |
|
|
|
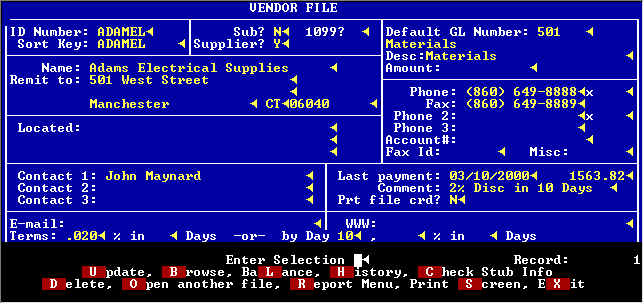
ADD/CHANGE/DEL VENDORS
This screen is used to set up vendors and subcontractors. You can enter a default GL account number as well as a default description and amount (like for rent).
A comment may be entered that pops up on the A/P screen each time you use the vendor ID.
The last payment date and amount are displayed for you.
A flag is available to mark this invoice to remind you while you are making payments by invoice. Invoices that are flagged are shown separately on the due date report as well.
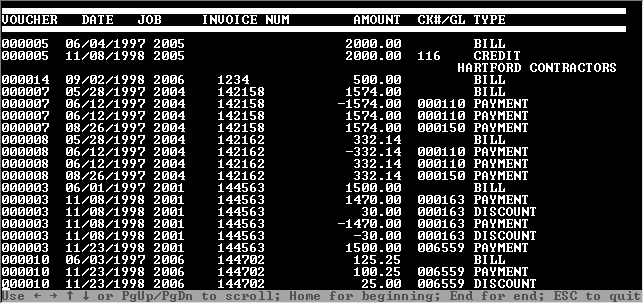
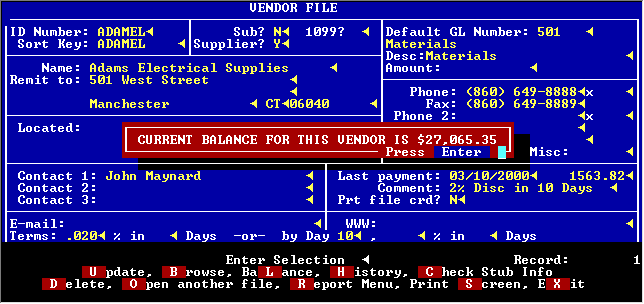
You can view or print a history of this vendor showing all invoices, payments and credits. You can also ask for a balance from this screen.
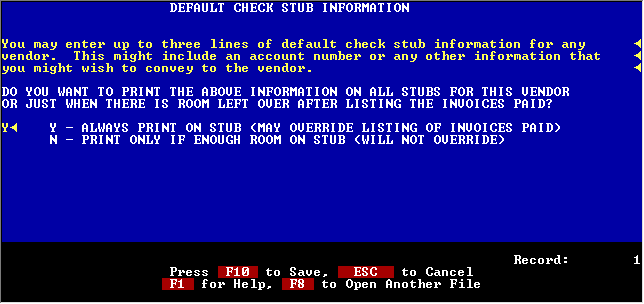
If you want to put some particular wording on the check stub for this vendor you can enter it on this screen. This feature comes in handy for garnishments checks where you have to name the employee and case number, etc.
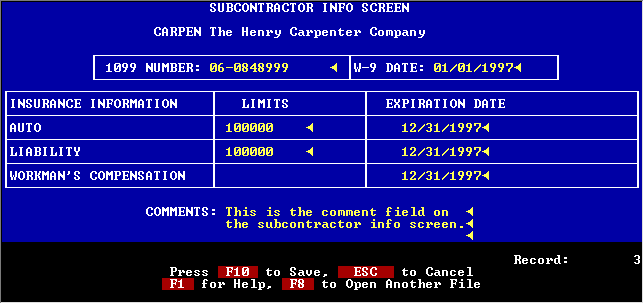
This screen appears for subcontractors. You can track the expiration dates for several policies if desired. When a policy comes within 30 days of expiration or expires, you will be warned while entering the invoice for this subcontractor.
You can use this screen to have the system remind you to get a 1099 number from a vendor. 1099 number can be entered any time prior to printing the 1099ĺs. It does not have to be entered before you cut a check to the vendor.
At the touch of a button you can view the entire history of a vendor showing all invoices, payments, credits and discounts. A more detailed history may also be printed.
The balance for a vendor is available immediately on the screen.
|